
1. There are 3 ways to enter DRB territory, but the stealthiest is up this alley almost opposite the Chiron Building. Head up the fire escape.

2. Head through the door at the top and out the other side onto this roof for a 100XP traveller bonus. You can crawl round the ducting on the wall to the fire escapes on the other side.

3. Climb down the fire escape to the ground level. You may have alerted some of the gangers, so hide and wait for them to calm down then sneak behind this red skip on the left. Sneak through a door to the inside.

4. Follow your nose to here as Pritchard contacts you with a mission update. Take this guy out quietly - 2 more gang members are nearby.

5. Make some noise to attract the attention of one of these 2 so you can take them out one at a time without being seen, then slip to the left under the broken door beyond them, and behind the red container.

6. Taking out the patrolling guard makes life easier a little later, but don’t do it too close to the group of thugs in the distance. When that’s done, slip to the left behind the concrete blocks and containers. (If you have heavy lifting, a large wooden crate blocks a vent, which leads to a later area).

7. As you round the corner, listen to these two talking about a rocket launcher. When they finish they take up separate patrols.

8. Carefully follow the one on the left round to here and take him out. Slip through the gap in the fence.

9. The first task is the weapons cache. Note the sewer cover, but first move the barrels to go through another gap for a 100XP traveller bonus and the weapons cache.

10. Use the box to complete this part of the mission, and swipe anything else useful, then head back to the manhole cover and go down to the sewer.

11. These 3 need to be split up to be taken out quietly. A fourth patrols beyond the far barrier. Use nearby barrels to attract the attention of the seated guy - he carries a pocket secretary with the code 5962.

12. The thug facing toward you is also easily distracted into investigating if you peek around this corner. The remaining 2 can then be picked off one at a time.

13. The reason not to leave these guys be - apart from the fun of taking them out - lies behind a weakened wall next to that fire barrel. This is why you should have kept a remote detonated explosive device. Place it on the weakened wall and detonate from a distance.

14. Your reward is a 200XP explorer bonus, a bunch of credits, and this Praxis kit.

15. Go back up the way you came to the weapons stash, and take out the other patrolling banger.

16. Then turn around and climb over the yellow container and drop down the other side for a 100XP traveller bonus. In the open storage container find a pocket secretary with the code 3290. Another manhole cover is nearby.

17. Go down and find this valve to turn off a gas leak in the duct on the left, then head in to find a credit chip halfway along. It brings you out near where the four gangers recently learned an important lesson. Go back the way you came again (another exit from the sewers comes out in the midst of the DRBs lurking outside).

18. Climb this staircase to find a level 3 door with the code 3290. Hack it for a nuke virus.

19. Head inside carefully and take this thug out. He also carries a pocket secretary with the code 3290.

20. Through the nearby door, find this guy having a smoke. He’s guarding a rocket launcher. In some playthroughs, he patrols. In this one he stayed where he was. I snuck around the room and knocked him out from behind. The highlighted vent in the ceiling leads back here.

21. Jump up to the vent and follow it here for a 300XP pathfinder bonus. You can go down the ladder to find another vent (to here) but you’ll need the heavy lifting upgrade to actually get out.

22. Whichever way you exit, make your way back to here. If you crawl throught the broken piping on the left, you’ll cause a thug up on the left to start his patrol, allowing you to take him down quietly.

23. It’s straightforward to attract the attention of one of the two gangers chatting by the fire and separate him off. That leaves 2 more thugs outside to be picked off.

24. When the area is clear, head through this door.

25. In the area beyond, 1 patrolling guy can be taken out quickly here, or when he returns. Two more at the far end won’t start their patrols until you approach them.

26. This pocket secretary has the code 5962 for the antenna - which we already have. The eBook is worth XP. "Vestibular Augmentation and Enhanced Agility Factoring [Volume 18]"

27. There’s nothing really of interest here, so taking the remaining 2 thugs out is just a matter of practice. Head back outside to find this door. (Behind the ladder, a gap in the wall leads to a hole in the floor which in turn leads back to the weapons cache).

28. Go through the door, but be aware of this guy who takes a leak in the corner. Take him down while he’s busy. The other two sat watching the TV are easily bypassed, but don’t miss the energy pack on the edge of one of the sofas.

29. Head to the left past them through the gap in the wall, and up a pair of ladders.

30. As you near the top, you’ll hear a familiar beeping sound - mines. Disable them all by approaching slowly.

31. Follow the corridor round, and listen to these two chatting. They’re easily bypassed, too.


33. Disable the signal jammer and head up the nearby stairs to a landing pad, where Faridah Malik will come and pick you up.

34. Use the VTOL to head off. We have some outstanding business with Jenny Alexander, but it will keep until we return. Signal to Malik you’re ready to go.

35. You’ve been taken to a factory complex at Highland Park.

36. Your objective is through the door on the left. The guy on the right will give you some info if you ask, and will sell you ammo, grenades, or a target leading upgrade. I purchase the grenades - a gas grenade will be useful later, and they’re scarce. Search the two open containers next to him for an energy bar, automatic unlocking device, and combat rifle ammo. You can climb onto the scaffolding in the centre from the roof of tyhe visible container for revolver ammo. Look for credits on a chair to the right of this door when you’ve finished, then through the door.

37. More credits are on shelves just inside the door. Follow the path round to this point. Approach the windows for a cutscene with Jaron Namir, Yelena Federova and Lawrence Barrett. When it’s over, sneak to the far end - note that you can be seen through these windows!

38. Out another door, you enter the courtyard. It’s patrolled by several guards. There are a few ways to proceed from here; one way is to make use of the tranquiliser rifle, but doing that so the bodies aren’t noticed isn’t as easy as it sounds. Sneakier is to take them out one by one. First up, get to the near blue gate post.

39. This nearest guard is overlooked by a couple of others, but if you’re careful and hide the body quickly afterward you can take him down without being seen. Otherwise, leave him until after you’ve taken out the next 2 guards.

40. An open container near the foot of the stairs you initially came down contains stun gun darts and credits. Then head left here to find an open container lorry with more stun gun darts and a stun gun.

41. Sneak around the outside of the truck to find target #2. Take him out as he patrols between the crates and this side of the army truck.

42. Two more guards patrol the Western end of the parking lot, and another two at the Eastern end. Take the Western side first - go back to the stairs, and sneak across the gates.

43. Slip behind the lorry on the North-West corner to find this guard patrolling behind the truck. He’s next. Then climb onto the large crate shown on the left, and from there to the scaffolding for a 100XP traveller bonus. Pick up credits, an automatic unlock device and Typhoon ammo from a crate on the scaffolding.

44. Drop down at the far end, and under the scaffolding for more combat rifle ammo, then sneak round a nearby flatbed truck to here for victim #3. He is easily taken out by getting behind him as he stands near this position.

45. Two guards remain out here. Go back to the open truck. This shot shows the 2 remaining guards (just about), and the body of victim #2. Move some crates on the right hand side of the hut with the number 3 on it and slip past.

46. You can climb on top of the generators to reach the breaker just visible ahead to disable the electrical hazard, but all it gets you are some credits and painkillers.

47. Patrolling the inactive robot box-guards beyond the generator "maze" (on the left of this shot) is this patrolling guard, and the last one stood still. Take the patrolling one first.

48. When all is clear, search the hut for a laser targetting system, and a pocket secretary with some background plot.

49. Finally go back to the scaffolding, and head behind the red containers just visible.

50. Hack the level 3 door for a nuke and stop worm (or use the code 7984) and climb the ladder. Yes, you could indeed have reached here without interrupting any of the guards! Go through another door upstairs.

51. Inside, find a credit chip on a nearby box and go through this door. Sneak over and take out the sniper rifle guy overlooking the outer complex.

52. Three guards are on patrol downstairs. To the left (East) of the area below, this guy is vulnerable to a tranquiliser dart in this position when he’s hidden from the other two, and a camera.

53. On the other side, find this vent and head in for a 100XP traveller bonus.
|
|
Go down 2 levels to find another vent, which comes out here. |
|


54. A guard patrols outside this door. Take him out when his back is turned.

55. Head back for the last patrolling guard near the parked trucks. Watch out for the upper camera.
|
|
|
Now for the office by the camera. The guard sleeping inside is easily disturbed and taken down, but it’s more fun to sneak to the other side and slip through the window to take him in his seat. |
||


56. Hack the level 2 PC for 75c or use the password NTLSEC59 found on a nearby pocket secretary. An ammo capacity upgrade and credits are also nearby. The guard is carrying an EMP grenade.

57. Go back out and sneak up the left hand side of the area, avoiding this camera.

58. At the end, one last troop is patrolling beyond a laser array. The keypad is level 2 (with the code 7984). Hack it for 75XP while he’s not watching.

59. Inside the office is the level 3 security console (could have saved ourselves some sneaking around!). The password is NEURALHUB, or hack it for 100c and 100XP. Disable 2 cameras. Hunt around for ammo, credits, an energy bar and hacking tools. Nearby, stairs to the gantry above, and a door to the parking lot take us to places we’ve already found.

60. Head back outside, and down this ramp to find an elevator. You know what to do.
|
|
On your way down, you encounter some impressive military equipment, and your boss seems surprised when you inform him it’s F.E.M.A. |
|


61. As you reach the bottom, the guards activate this robot box guard, which starts showing off its stuff. Hide, swipe the EMP grenade and slip to the left.

62. Be aware of guards patrolling the gantries above, and climb over some pipes to enter the storage cage on the left hand side. Slip into this vent in the floor for a 100XP traveller bonus, then double back. The ducts lead beneath some raised areas, but it’s hard to see what’s going on above.

63. Instead carry on through the storage area and out the other side. Your objective is the door, just visible on the left. You can chuck an EMP grenade at the 'bot to destroy it for a 250XP hunk of junk bonus, which will cause the guards to become alarmed, but not yet hostile. Taking them out without alerting the guards above is hard, so when they’re backs are turned, go through the door to the South.

64. Wait for these two to finish chatting and start their patrols. The guy on the left will approach so you can take him out.

65. Follow the other guard to here. He goes to the main office area ahead. You should go into the security room on the left. A level 2 security console (password NEURALHUB) can be hacked for 75XP, a nuke and a stop worm. Disable 3 cameras.

66. A pocket secretary has the password usprotkt to the level 2 PC, which gets you 75XP and a stop worm for hacking. Read the emails for plot background and search for credits and ammo.

67. Return to here and climb the ladder. At the top, carry on straight ahead.

68. You come to this office overlooking the area with the recently demised box-guard. Swipe the nuke from the console ahead, then out of the door on the right.

69. The three guards patrolling the gantry can just about be taken out out of sight of each other. This one first. Hide the body afterward. Do the same with the other two. A couple of level 2 alarm panels can be hacked for stop worms. With these 3 out of the way, you can take out the 2 guards still on patrol below. Another level 2 alarm panel is downstairs with a nuke for hacking it.

70. Return to the top of this ladder, and then over to the left for another office.

71. Hack this level 3 security console (same password as all the others: NEURALHUB) for 100XP. Disable a camera, and open a door which is just round here on the left. A shotgun, rockets and Typhoon ammo are inside. Behind this shot is an unlocked door.

72. It leads to a similar office similar to the one overlooking the box-guard. An ammunition case under the console ahead has tranquiliser and stun gun darts. Ignore the PC for now and head out of the unlocked door.

73. This top area is patrolled by 3 guards. Sneak along to the door on the left.

74. Inside the office, the pocket secretary has the login WKS3021/hmldsec1 to the level 3 PC (hack it for 100c). Read the emails to learn that the security computers all have the same login. I guess we’d figured that out already. Hunt around for credits and ammo, then head through the vent to the next office, picking up a credit chip on the way.

75. The guard visible on the right will see you hacking the level 3 PC for 100XP if you’re not careful. Hunt around for credits, ammo and a stop worm before sneaking out of the door.

76. Opening the door fortuitously attracted the attention of this guard, so I can take him out as he comes to investigate.

77. Now I just need to get to this office on the left. Take out the guard out of sight, and hack a nearby alarm panel for 75XP and a nuke, then go in.

78. Hunt around for credits, ammo and hacking tools then hack the level 3 security hub (once again, password NEURALHUB) for 100c and 100XP.

79. One more guy up here, who’s easily avoided if you prefer. Make your way the long way round back to that office (unless you have the heavy lifting upgrade to move boxes out of the way). Hack the level 2 alarm panel for 75c and a stop worm, and the level 2 PC in the office for 100c before heading back to the ladder and downstairs.

80. Head back to detention room D.

81. There are several patrols here, and a turret. I save my Praxis points for now.

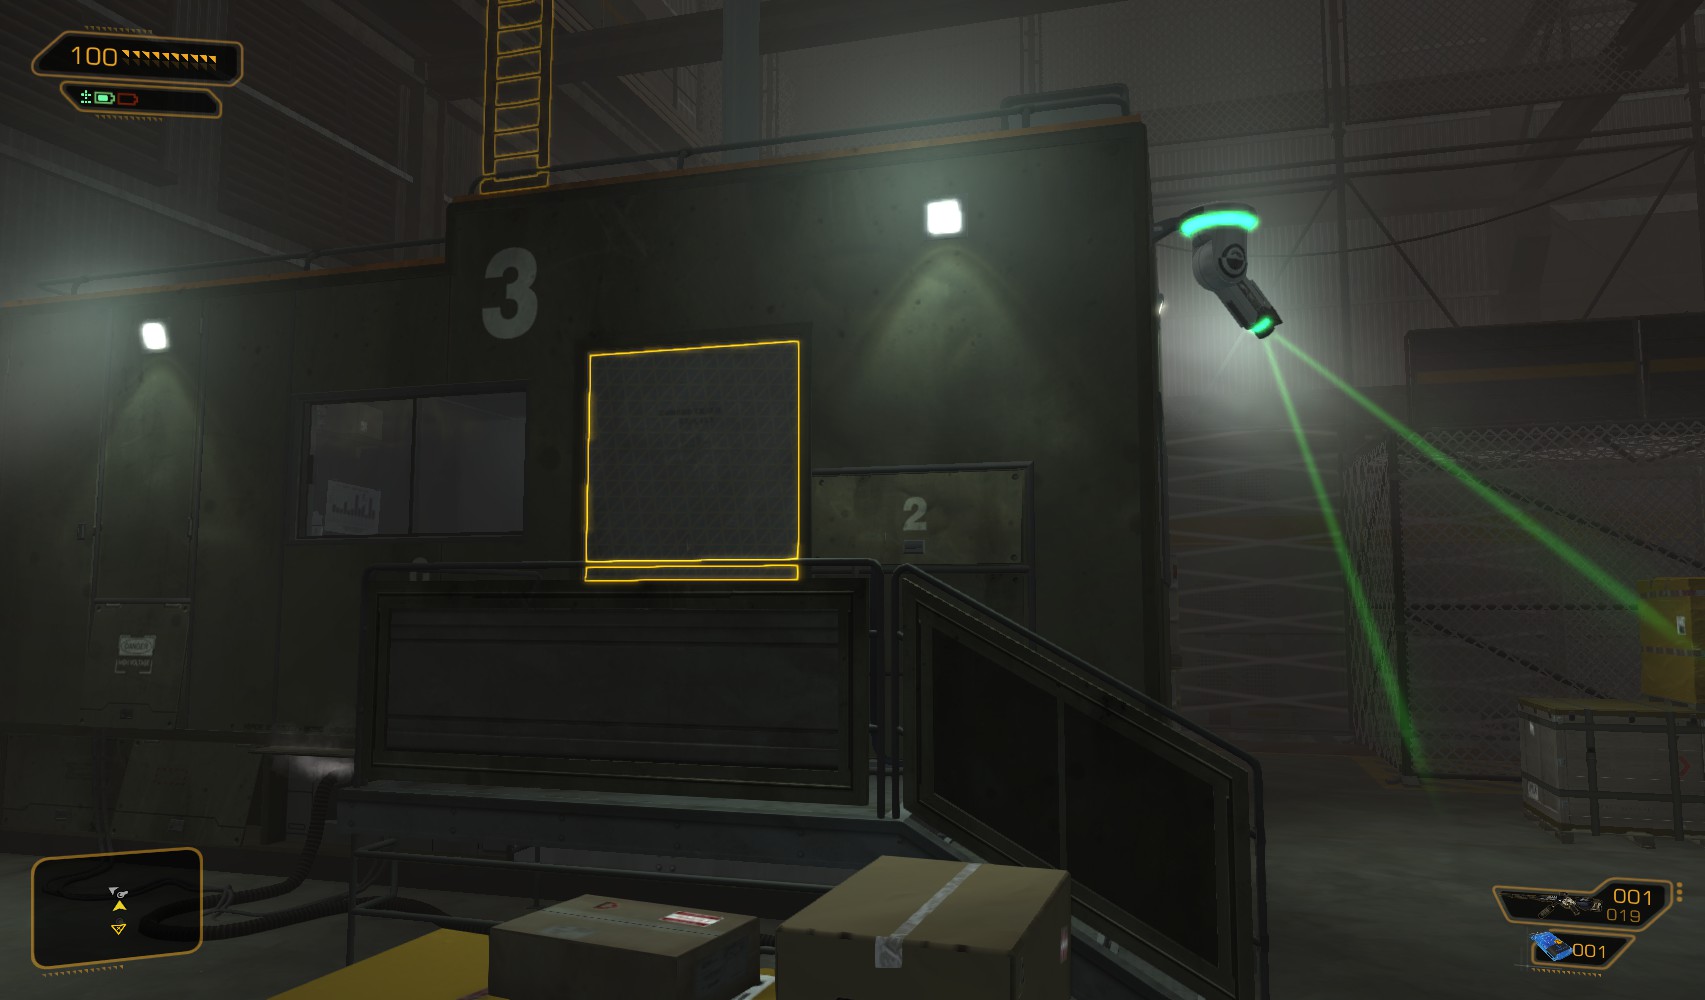
82. Mindful of that turret, I sneak into this vent behind the boxes for a 100XP traveller bonus.

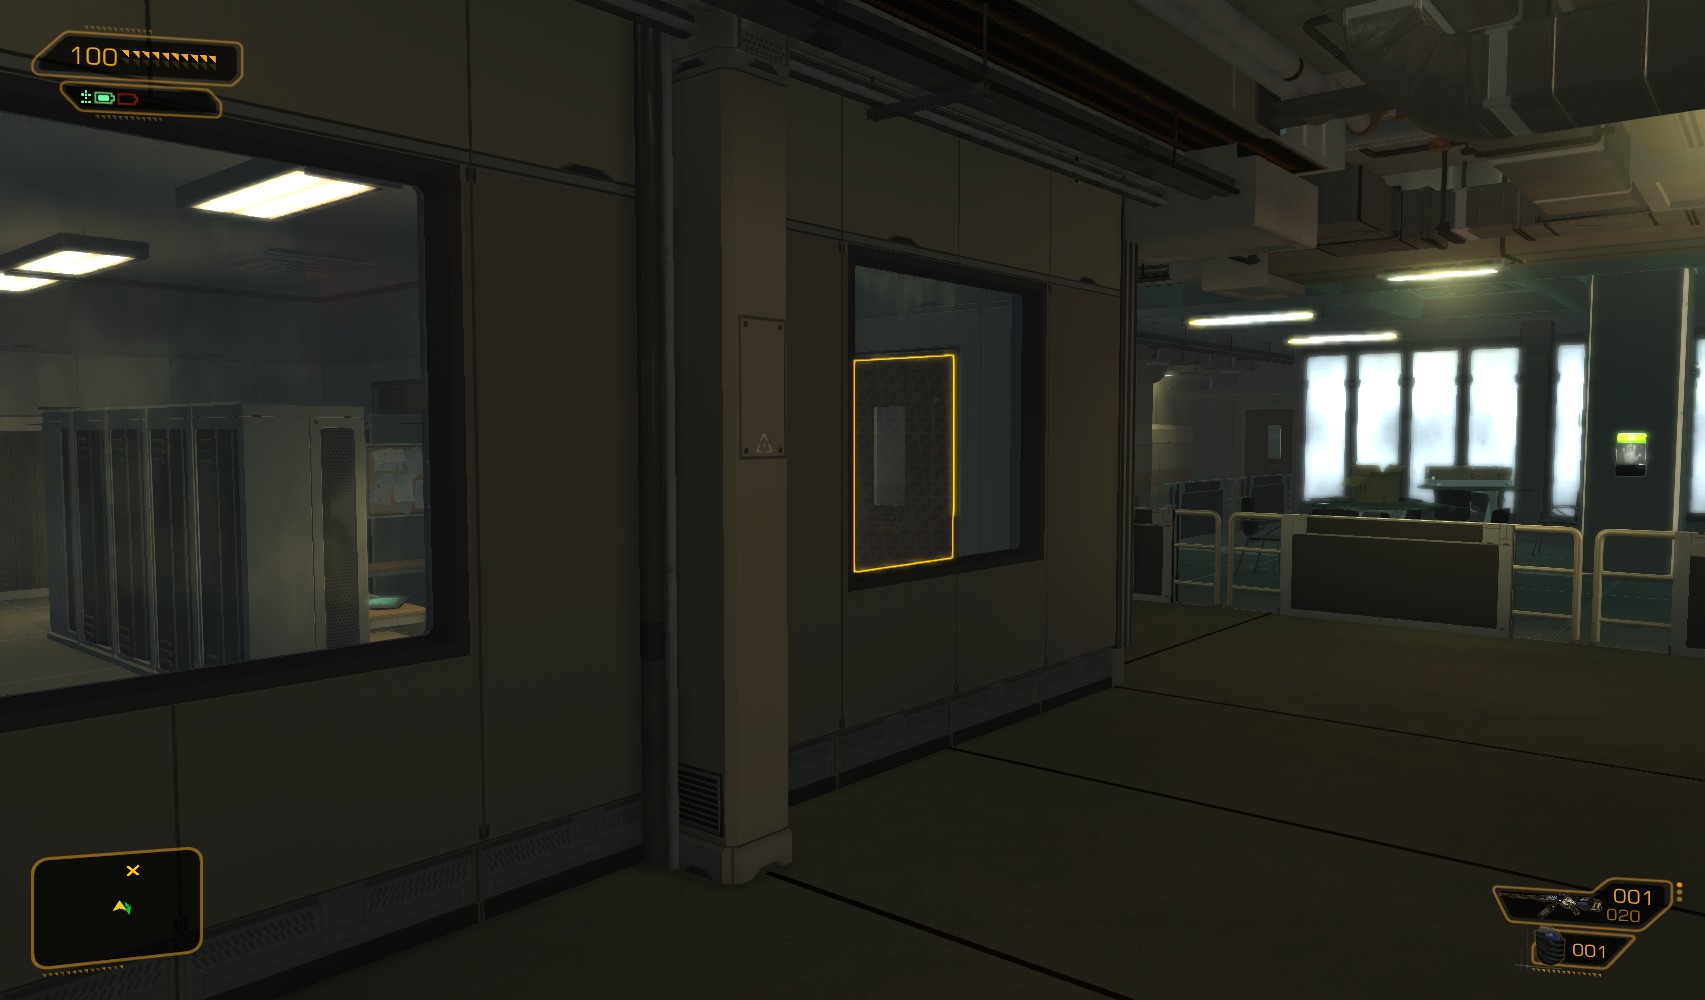
83. Keeping right, I pop up here. The nearest cube on the left has an energy bar, on the right an eBook. Middle left has combat rifle ammo, middle right a pocket secretary with the login lbarrett/BULLSKULL. Far left another pocket secretary, far right some revolver ammo.

84. Minding the guard (who is easily taken out, admittedly) I head left for 3 more offices with ammo, another eBook and credits, before heading all the way down to the left.

85. There are two unlocked doors here. I take the nearest.

86. The laser array is easily bypassed by just using the other door. It’s a level 2 hack (password again: 7984) for 75c and 75XP. A vent just beyond it is worth entering for a 200XP explorer bonus but just leads back to another vent behind a heavy crate to the left of this shot.

87. Follow the corridor round to find these two F.E.M.A. officials. Bluff your way past and use the code 7984 on the door (it’s level 1, but these two will raise the alarm if you try to hack it).
88. Inside, hunt the locker room for credits, painkillers, hacking tools and ammo. More credits and an energy jar are on tables in the breakout area.

89. On the other side of the room, this door is overlooked by the two guys outside. Again, the code 7984 works, or you can stack boxes to hack it (level 2 for a nuke).

90. Inside is Barrett’s level 3 PC. Hack it for 100c and 100XP, or use the code BULLSKULL. Read the XP eBook nearby before leaving. "Blurring The Boundaries between Man and Machine [Volume 1]"

91. The level 2 alarm panel can be hacked by re-stacking boxes for 75c, 75XP and a stop worm, then head through the door on the far left.

92. Boxes for stacking can be found in the room ahead - hidden behind them is a reload speed upgrade. Hack the level 2 security console (that same password, NEURALHUB) for another 75c, 75XP and stop worm, and disable the camera outside. Round to the right from here are stairs to the offices upstairs, and a door back to detention room D. Head left to the medical bay.

93. Find credits and a hypostim in the first bay. Through the other door is another bay with a pocket secretary containing a rather disturbing message. Leave the bays, and take the elevator at the end of the hall.
|
|
Head straight on and follow your nose to this door. Go in for a cutscene with your first end-of-mission challenge with Barrett. |
|


94. Barrett’s a pretty tough cookie, and you don’t want to get too close. I’m playing the Director’s Cut edition of the game, giving me options beyond a straight fight trying to throw explosive barrels at him! As soon as the cutscene ends, I run to my left to find a ladder, and head up. I take some damage, but nothing critical.

95. From here, I head through the vent to the other side.

96. It’s not like it’s totally safe up here, so stay hidden. Head to the right.

97. This level 1 security hub can be hacked in relative safety for 100c and a nuke. Disable 2 cameras and open the doors downstairs. Then slip down another ladder just behind you in this shot.

98. If you’re lucky, Barrett will still be at the far end of the room. Sneak over to the right through the doors you just opened.

99. Follow the corridor round, noting some inactive turrets on the left. Move some cardboard boxes away from that vent and head in.

100. Go left. Now would be a good time to upgrade those hacking skills for turret domination. The vent comes out here. Hack the level 2 security console (50XP and a stop worm) and switch the turrets to "Enemies". A pocket secretary nearby has the code 3971 to a storage room.

101. Now it’s just a matter of luring Barret in range of the turrets. He stands no chance.

102. Tells you to get to Hengsha in Shanghai before pulling a trick…

103. When it’s all over, hunt around for goodies, including a whopping 800c credit chip in the North-West corner. The level 1 door to the security office where you hacked the turrets can now be hacked for a stop worm. When you’ve finished looting, take the elevator at the end of the room.

104. It brings you out back at the chopper. Faridah takes you back to Sarif HQ.

105. When you land, you get two new objectives - meet Sarif in his office, and meet Pritchard in yours. There are some loose ends to tie up first.

106. Head out, and back to Jenny Alexander near the DRB area. I sell off some unwanted gear at the gas station, and then use the overpass on the right.

107. On my way I’m treated to a guy throwing shapes.

108. If you left the crossbow somewhere before heading to Derelict Row, pick it up before talking to Jenny.

109. Having collected all the evidence, and remained undetected in the DRB’s territory, Jenny gives you 1000c and an ammo capacity upgrade. You also get a new side mission - to confront O’Malley in his apartment. Go back through the alley behind Jenny, and crawl back to the basketball court.

110. Here’s O’Malley, in his apartment. There are a number of ways to deal with this mission part.
|
|
If you talk with O’Malley, and accept his bribe, he’ll disappear. You’ll find a bottle of wine with 3000c, and an eBook letter from O’Malley in your apartment. |
|


111. You can fight him straight off, or decline his offer, and he’ll turn hostile. If you start from behind him before talking to him, you’ll be there when the conversation is over, and can just knock him out for 300XP. You don’t have to talk to him at all in fact, but you sacrifice the 300XP completion reward.

112. Head outside to find Jenny nearby. The dialogue will depend on which choices you made with O’Malley. Time to head back to Sarif HQ.

113. Since Pritchard’s waiting for you in your office, his office PC can be hacked for a nuke virus, but requires an upgrade because it’s level 5. Read the emails to learn some passwords, and that Francis is a wannabe author.

114. Head up to your own office on the 2nd level to find the man himself waiting for you. Talk with him to learn that Sarif himself may have set up a backdoor into the security systems. Read your emails for a new one giving the code 0250 to office #30 before using the elevator just outside your door up to David Sarif’s office.

115. As you approach this group, a cutscene conversation with Bill Taggart ensues. When it’s over, speak to Isias Sandoval, his aide on the left flanked by the bodyguards. If you talk to Athene you get to hear what she thinks of David Sarif. When you’re done, head into his office.

116. The conversation allows you to make some choices. You’ll need to listen carefully and refocus the conversation if he tries redirecting you, or defending your actions if you feel it necessary.

117. If you succeed in persuading him to let you see the data he downloaded, you get the Silver Tongue achievement. Go back to your office to read the emails between Brent Radford and Sarif about you. Afterward, return to speak with Sarif for a mission update.

118. Head back downstairs. Before going out to the chopper, there’s one remaining office to investigate - Faridah Malik’s in #22. It’s a level 4 hack for 150c and a stop worm, or use the code 5475. Her unlocked PC reveals the code 8053 to the helipad storage area. When you’re done, head out the door shown here on the left to the helipad.

119. On your way, investigate the vent below the kitchen area for some tranquiliser darts and PEPS ammo before going outside.

120. The storage area is at the far end of the helipad area. Go down the steps and open the door. It’s level 5 for 500c, and has the code 8053.

121. Inside is a bunch of stuff including an ammo capacity upgrade and more Typhoon ammo.

122. All the side missions are complete for this part, so talk with Faridah to head to Hengsha.