
1. You awaken on board a ship bound for a Belltower Naval Facility. Commander Pieter Burke (on the right, here) seems to be responsible for the sorry state you appear to be in.

2. Netanya Keitner seems much nicer, and explains you’re on your way to Rifleman Bank Station - an off-grid black site. I choose to joke with her initially, but own up that I don’t much like killing people, and am neither a terrorist nor a corporate spy.

3. Eventually the cutscene ends, and you find yourself released, but without equipment, and your augs have been reset to their original (i.e., low) values.

4. In the next room, the level 1 door can be hacked for a stop worm, but instead of going out that way (which you can do while the 2 guards are still outside chatting), move the crate and drop into the crawlspace for a 100XP traveller bonus. I find that any opportunity to get XP and build up my augs again is useful in this part of the game.

5. When you emerge, head for this door. You can crouch beneath some pipes that just takes you back to your cell door.

6. Outside, this near guard can be taken down if you’re careful. I found the easiest thing was to attract his attention to make him come to the door. With him out of the way, the other guy on the left is easy enough. He carries a pocket secretary with the codes 7331 and 3713. I notice I have a Praxis kit to spend, so I upgrade my hacking skills and loot the level 2 alarm panel for 100c and a nuke. A level 3 door is out of reach of my skills, but the code 7331 will work, but I ignore it, because I want more XP!

7. Return to the door opposite the one you came through just now. Wait for these 2 guards to move away then sneak past the camera to the door at the far end, ignoring the open door on the right for now.

8. From here you can attract the attention of the one guard who patrols so he moves away from the camera, and take him out. Now sneak past the camera to the other closed but unlocked door.

9. Head through the vent and into the other room behind the remaining guard.

10. Back through the door you used as cover, and move a nearby crate to climb on top of the pipes for a 100XP traveller bonus and a pocket secretary with the same message as that found on the guard earlier. Keep going round to find another level 1 door with the code 3713. Hack it for a nuke.

11. You reach the other side of the level 3 door richer for the experience. Climb the ladder carefully - a guard patrols at the top.

12. Knock out the guard at the top and nab his pocket secretary with the code 4867, which works on the laser grid. Alternately, you can hack the laser grid panel - level 2 - for another nuke.

13. Even though your immediate objective is right here, there’s more XP to be had. Return to the door by the stairs.

14. Attracting the patrolling guard’s attention once again gets you a takedown, then move one of the nearby crates to climb onto the pipes into the vent for a 100XP traveller bonus. Take the stationary guard out at your leisure. Another level 2 alarm panel is nearby for 50c.


16. Inside, swipe some mines and grenades on the left, and then duck into the vent hidden behind the red barrel. At a junction on the right, find a pocket secretary with the code 1923. Don’t go up that vent yet - two guards in the room above strike up conversation as you approach, and one of them patrols outside. Return the way you came…

17. ...and take him out above. Then go into the open door.

18. The second, seated, guard is now easy takings. He carries a pocket secretary with the login OPSEC-Hub_11/9g11vj4m, which works on the nearby level 1 security console. I prefer to hack it for its 100c. Turn off the camera, then head back into the vent in the floor.

19. An electrical hazard hinders your passage. Go through a vent on the right, and find a breaker switch behind some crates to turn off the juice, then carry on.

20. You get another 100XP traveller bonus, and end up here. Read the pocket secretary to learn you have a co-conspirator. Climb over the boxes to find your kit.
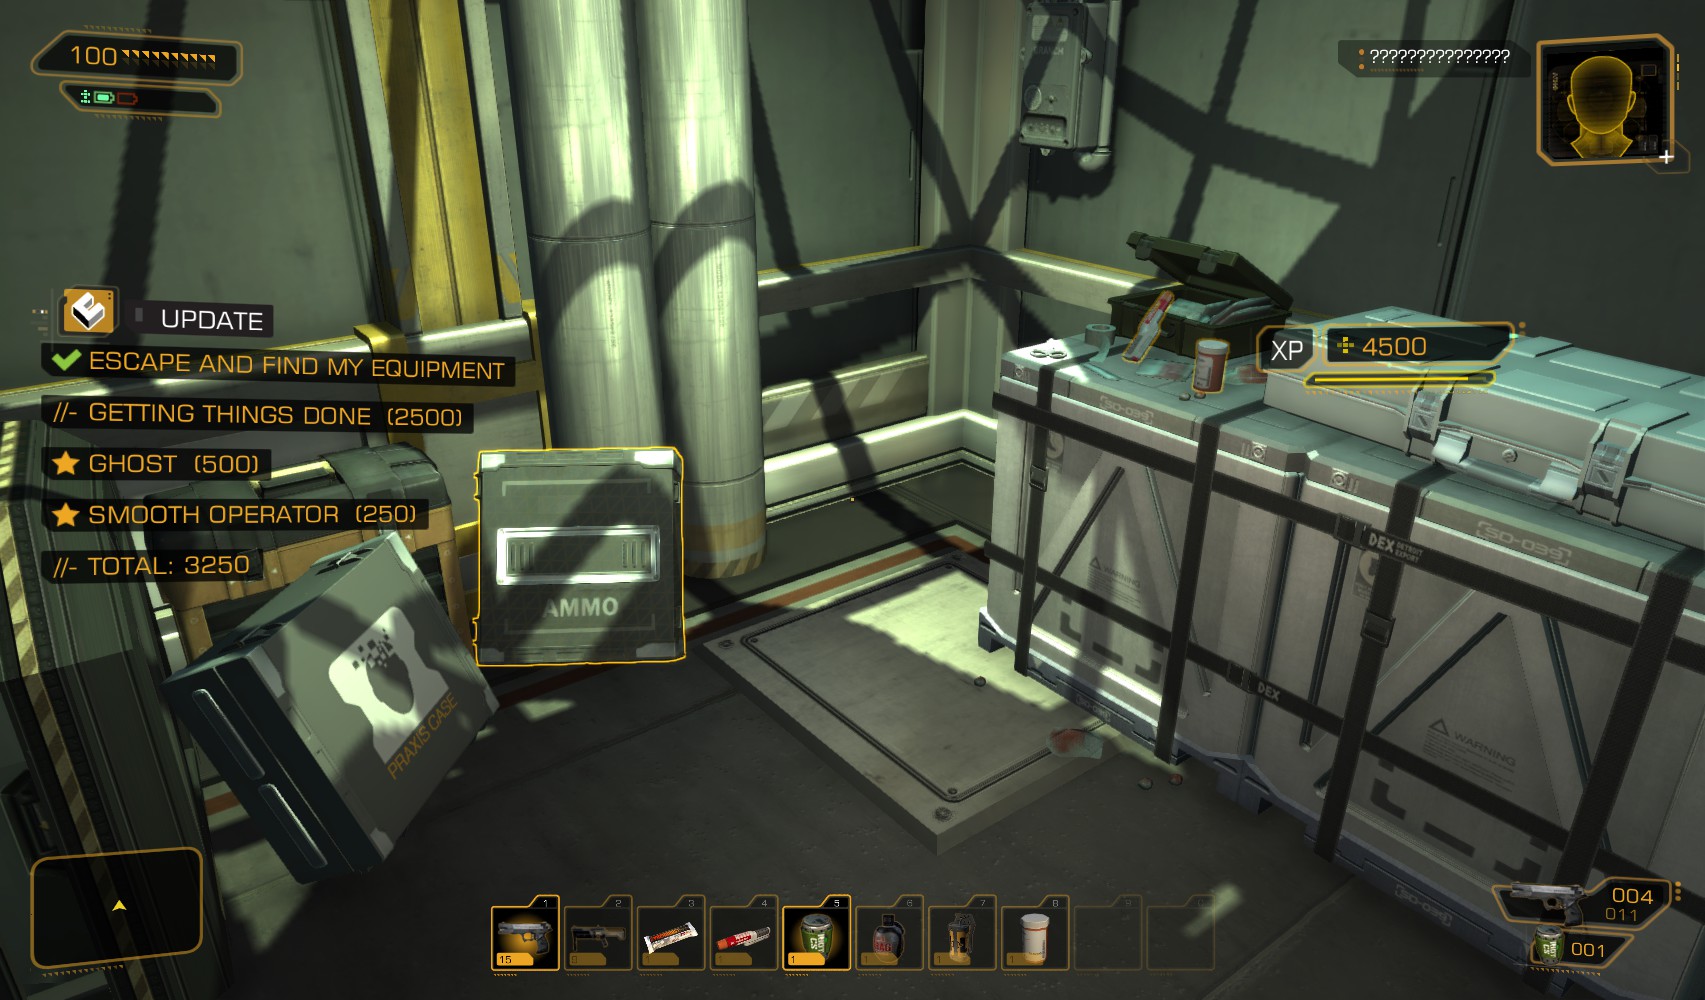
21. When you put on the body armour in the corner, you get a mysterious message over your comlink to find the CIC. Nearby is a case with your gear (well, much of it) and a case containing 7 Praxis kits. The nearby level 3 door is now unlocked, so I save those Praxis points until I need them.

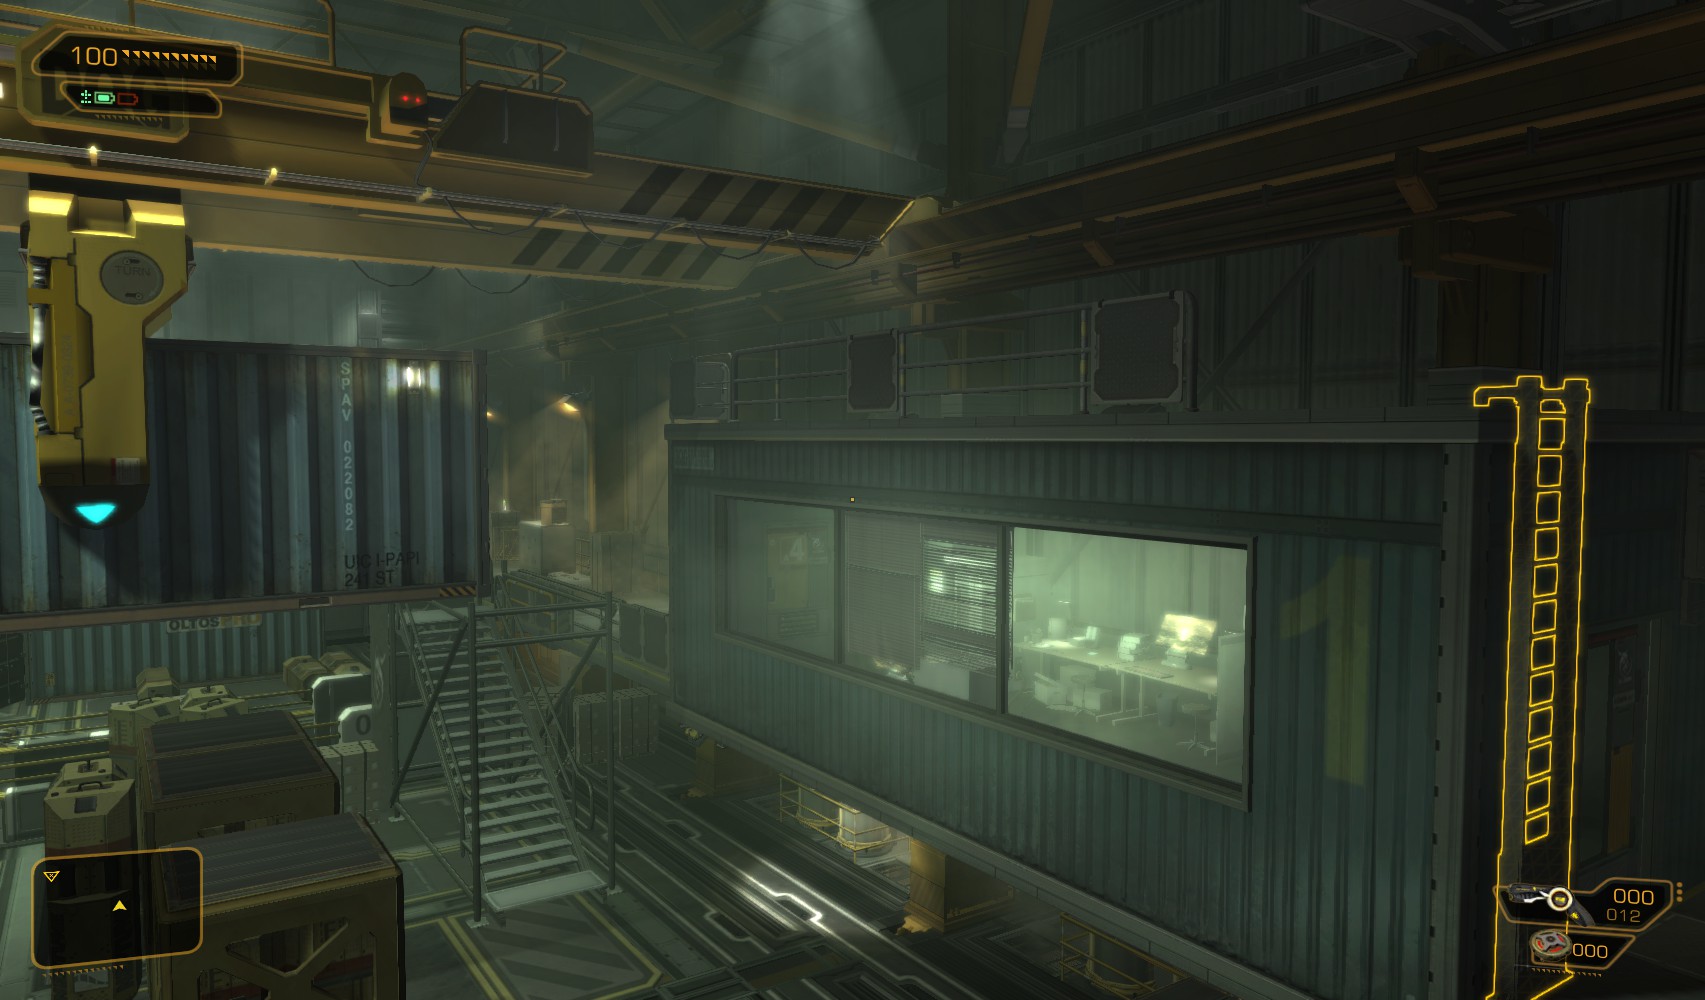
22. Go out the door and turn right, following signs to the Forward Cargo Hold. As you approach this door, you hear what sounds like some items in the hold falling. Time to investigate. You hear an announcement that one of the stasis pods is about to fail.

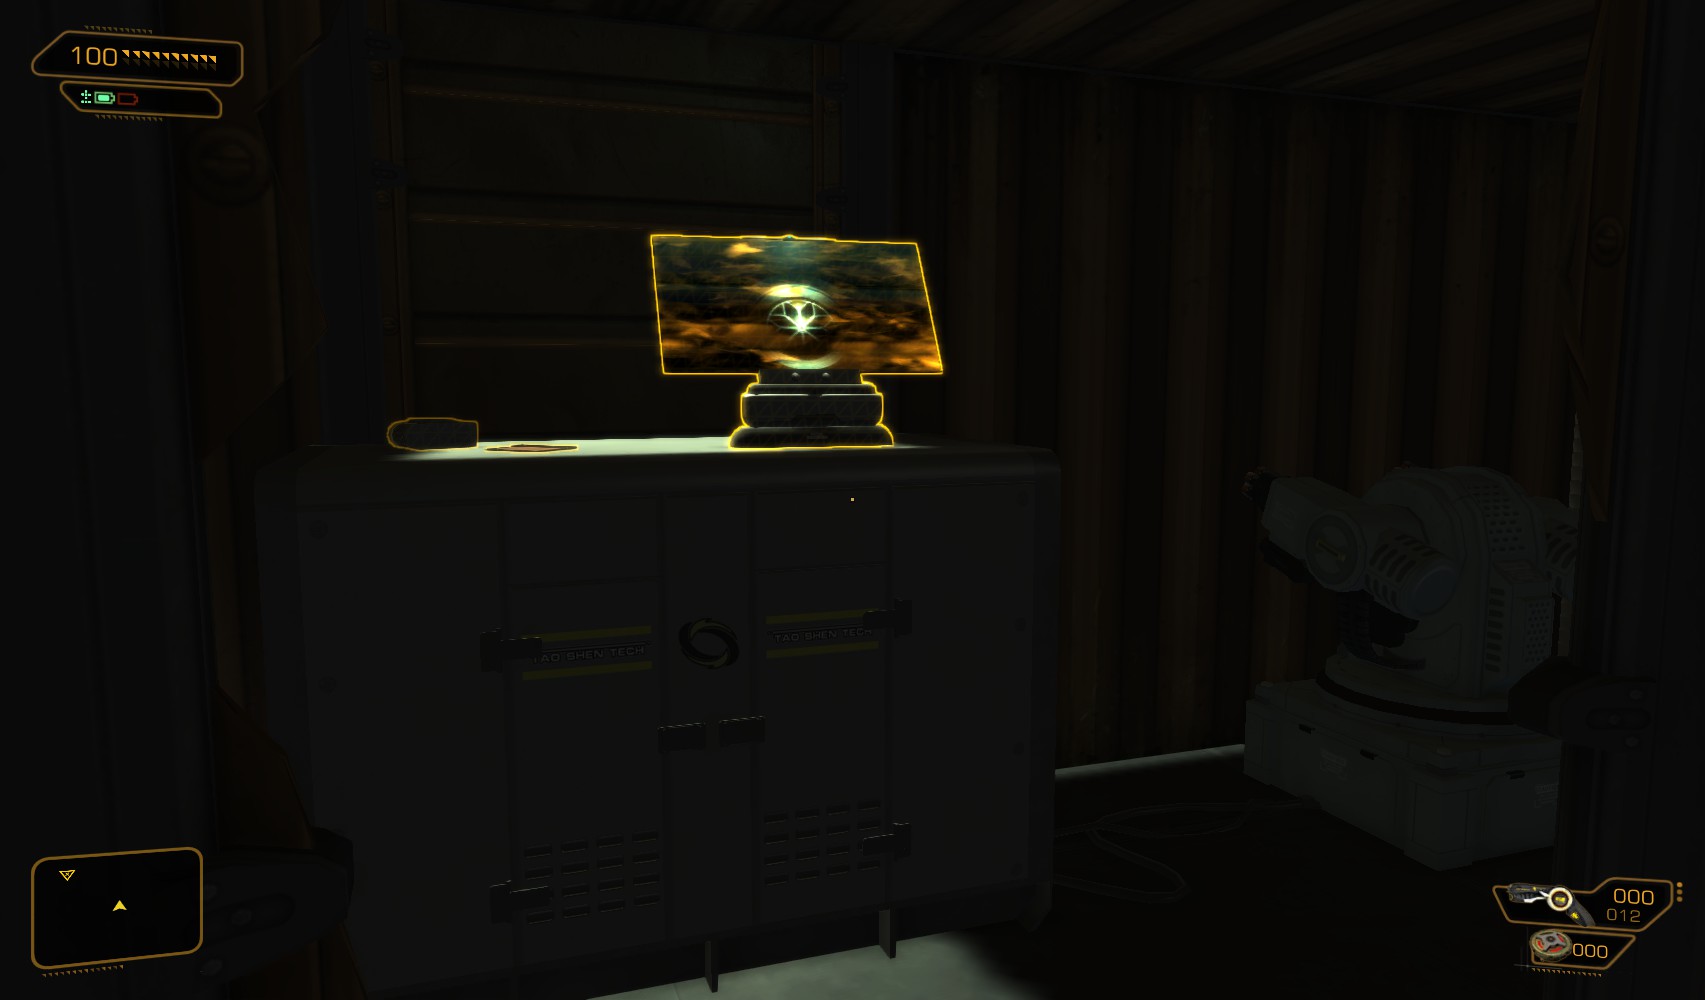
23. The unlocked PC on the left identifies the pod as #73. The other PC is also unlocked, and contains some background. Hop through the window and drop down to the lowest level for a 100XP traveller bonus.

24. On the Eastern side of the hold, it’s pretty clear which pod needs attention, but you need to find a replacement for the broken server battery. A door nearby leads to a "Storage Room" - that sounds pretty promising.

25. What you need is behind these crates inside. Move a crate on the lower left and crawl through to reach it, and a reload speed upgrade.

26. Return to the damaged pod and replace the battery. Read the pod’s to learn about the occupant. Logs on the other pods in the hold are sometimes harrowing. Search for an energy pack before returning to the storage room and riding the elevator to the top.

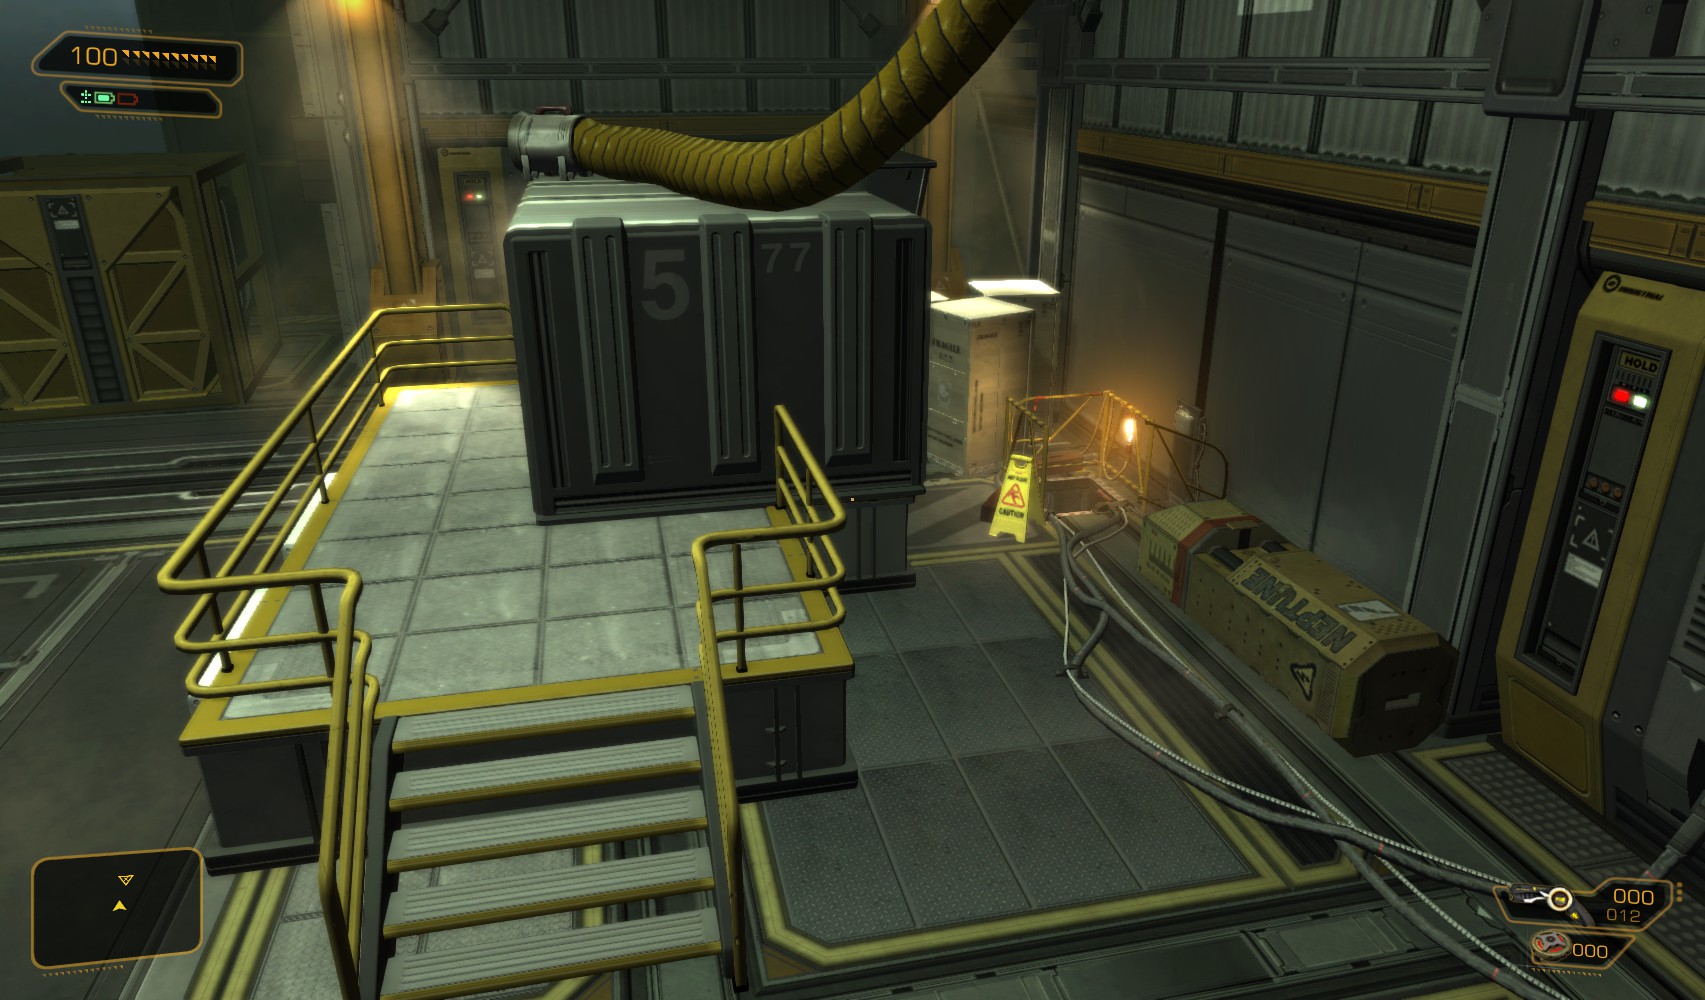
27. Climb back through the window, and onto the top of the grey container.

28. It’s time to spend some of those Praxis Points. Invest in the leg upgrade, and jump up to the open container on the right for a 200XP explorer bonus and an ammo capacity upgrade. Getting out again can hurt a bit, but not fatally if you’re lucky. Next, climb the ladders up above it to the top.

29. Climb onto the lift mechanism, and use the "Horizontal Axis" button to travel to the far end.

30. The drop to the right requires the Icarus Lander, but it’s worth it.

31. At the bottom, go into the open container and move a crate for a 300XP pathfinder bonus and a couple of grenades. Then come out and drop to the corridor on the right.

32. At the junction, jump up to the open crate on the right and climb to the back for a 200XP explorer bonus and some hacking software before coming back to here and navigating the boxes partially blocking the corridor on the left.

33. Climb into the other hold and up the ladder shown.

34. At the top, search this open container for a 200XP explorer bonus, then climb the containers on the right here to find another open container near the far end.

35. Search it for another 200XP explorer bonus, along with a tranquilizer rifle, energy bar, stun gun and ammo.

36. Return to the North-west corner to find the ladder leading to the deck.
37. At the top, knock out the guard as he starts to patrol, then continue on under the stairs beyond him.

38. Approach the corner carefully, then wait for these 2 to finish nattering and start their patrols. Take them down one at a time. Hack the level 2 alarm console for kicks - no downloads on this one.

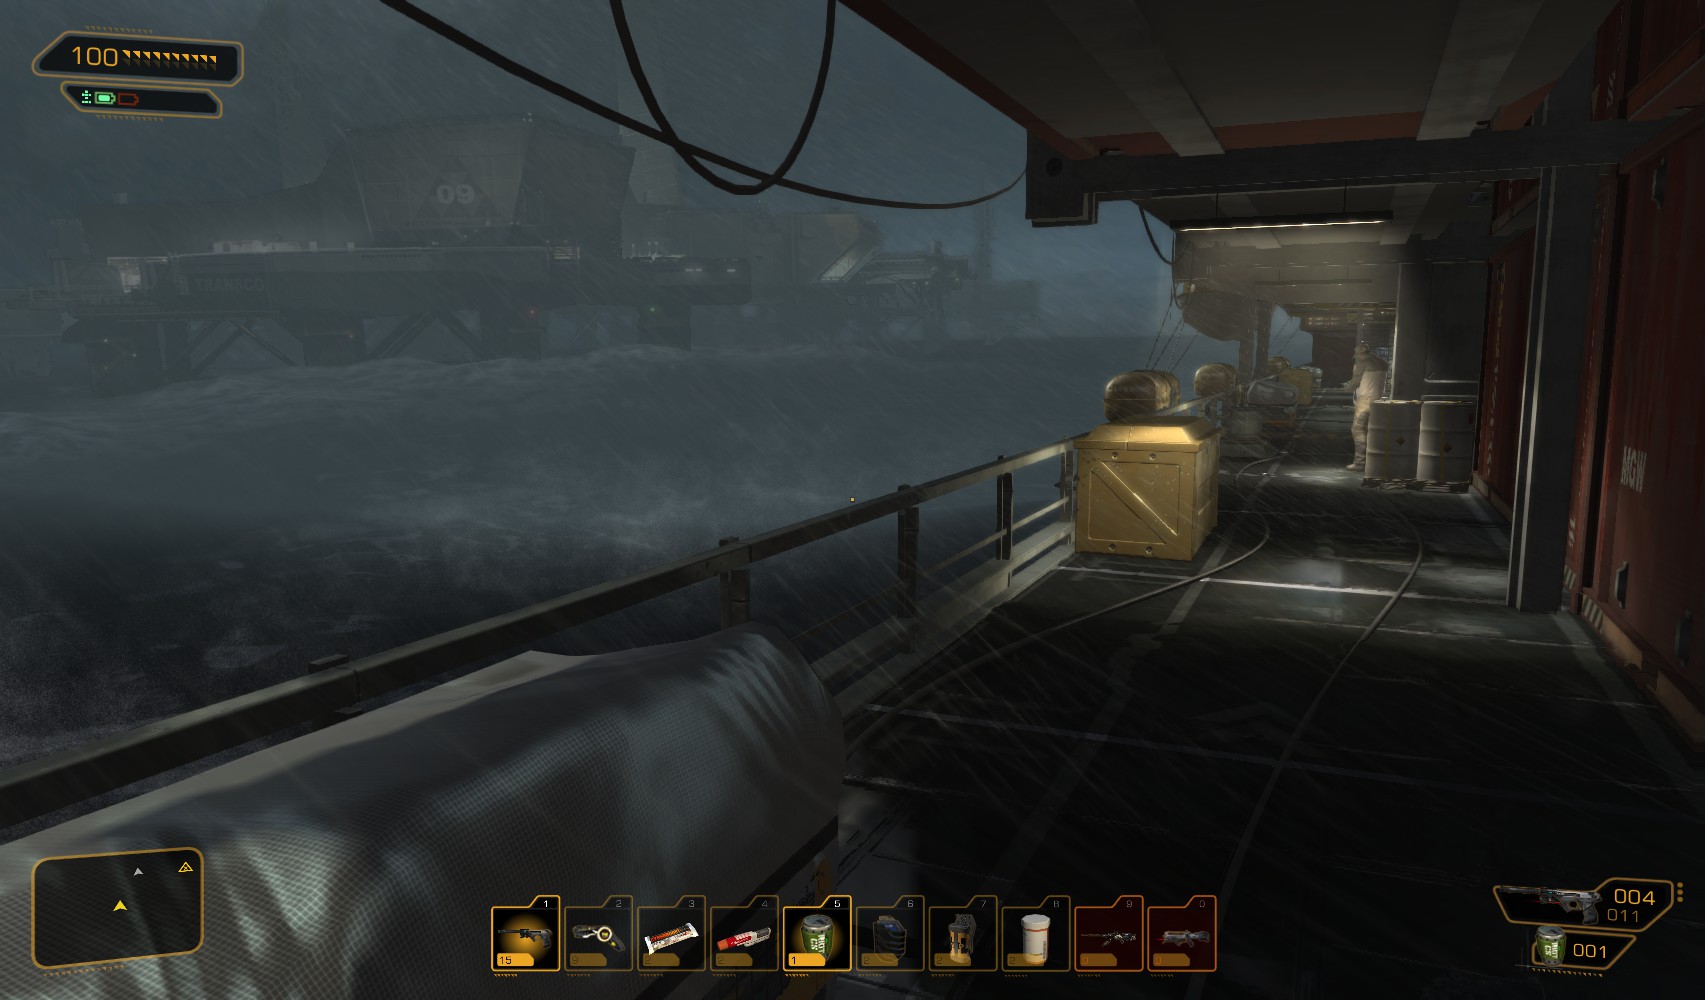
39. Ignore the door, continue on along the deck to find these 2 chatting. One will start to patrol when the conversation is over, so attract his attention to take him down out of sight of the other guy, then take him out too.

40. Continue round the deck to here. Hack the level 2 door for 100XP and a stop worm. Behind it are an energy bar and a reload speed upgrade inside some cabinets. Climb the barrier on the left for a 100XP traveller bonus.

41. You’re almost back where you started. This time, go up the stairs. If you double-back on yourself at the top you get to play with this transporter device.

42. On the Eastern side of the gantry, one last guard patrols outside. Take him out when the camera is facing away, and move his body. He carries a pocket secretary with the code 1284. There is a level 2 alarm panel nearby (again, no downloads). You can hack the level 1 door while the camera is pointing away, but it has no downloads. The code 1284 works here, but instead, return to the deck level and the open door you passed just now.

43. Carefully approach this door to provoke the 2 inside to start up conversation, then hide behind a nearby crate. One of the guards will start to patrol. Again, taking him down needs careful timing due to the camera at the end of the hallway.

44. This guy is best taken out with the stun gun. A pocket secretary nearby has the code 6782. Hunt around for hacking software, and an eBook. "Electrogravitic Technology Applications [Volume 19]". Carefully head up the corridor, evading the camera, and hack a level 2 alarm panel for 50c.

45. Duck under the camera, and along the corridor past the stairs to find a level 2 door. Hack it for 50c, or use the code 6782. Inside, a damage upgrade, energy bar and pocket secretary with the code 8790.

46. Return to the stairs and head up to find the entrance to the CIC blocked with a laser grid. The level 3 panel requires spending a Praxis point, for a nuke (the code 8790 works too). The level 2 alarm panel gets you another 50c. Head round to the right to find the door you ignored earlier. No downloads from this side, either! Return to the CIC.

47. The control room is pretty blinken lights. Two unlocked PCs have some background (seems Quinn noticed that someone fixed the broken pod!). There are credits and hacking tools lying around.

48. Before heading to the upper part of the CIC, hack the alarm panel (level 2, 100c) beyond the door, and enter the vent on the right for a 100XP traveller bonus.

49. Go into the upper level to start a cutscene - it’s not Pritchard you’ve been hearing on your comlink after all. You receive new instructions - get to the aft cargo bay and find the sally port. 2 guards have entered the lower area as the cutscene ends, but they won’t bother you if you’re quiet.

50. This pocket secretary has the password a12e11bk for the level 2 security console nearby. I hack it for 50c and disable 2 cameras. A level 1 PC gets you 100XP for hacking it. The level 2 alarm panel just 50c.

51. Find hacking tools and tranquilizer darts in some cabinets before leaving by this door.

52. Drop this guard when the 2nd patrol’s back is turned, and then take him out too.

53. Swipe the credit chip just inside this vent (which was almost hidden behind 2 crates) before heading out through the (now open) door by the security panel.

54. It doesn’t matter whether you use the stairs or a ladder to the right of the door.

55. I chose the ladder, and arrive here. Go through the vent for a 100XP traveller bonus. Beyond the door, 2 guards start up a conversation, then one starts patrolling - once more, attract his attention to lure him away from his stationary colleague. He carries a pocket secretary with the code 1094.

56. Ignore the door part way along, and take out the other guard, then hack the level 2 alarm panel for 100c.

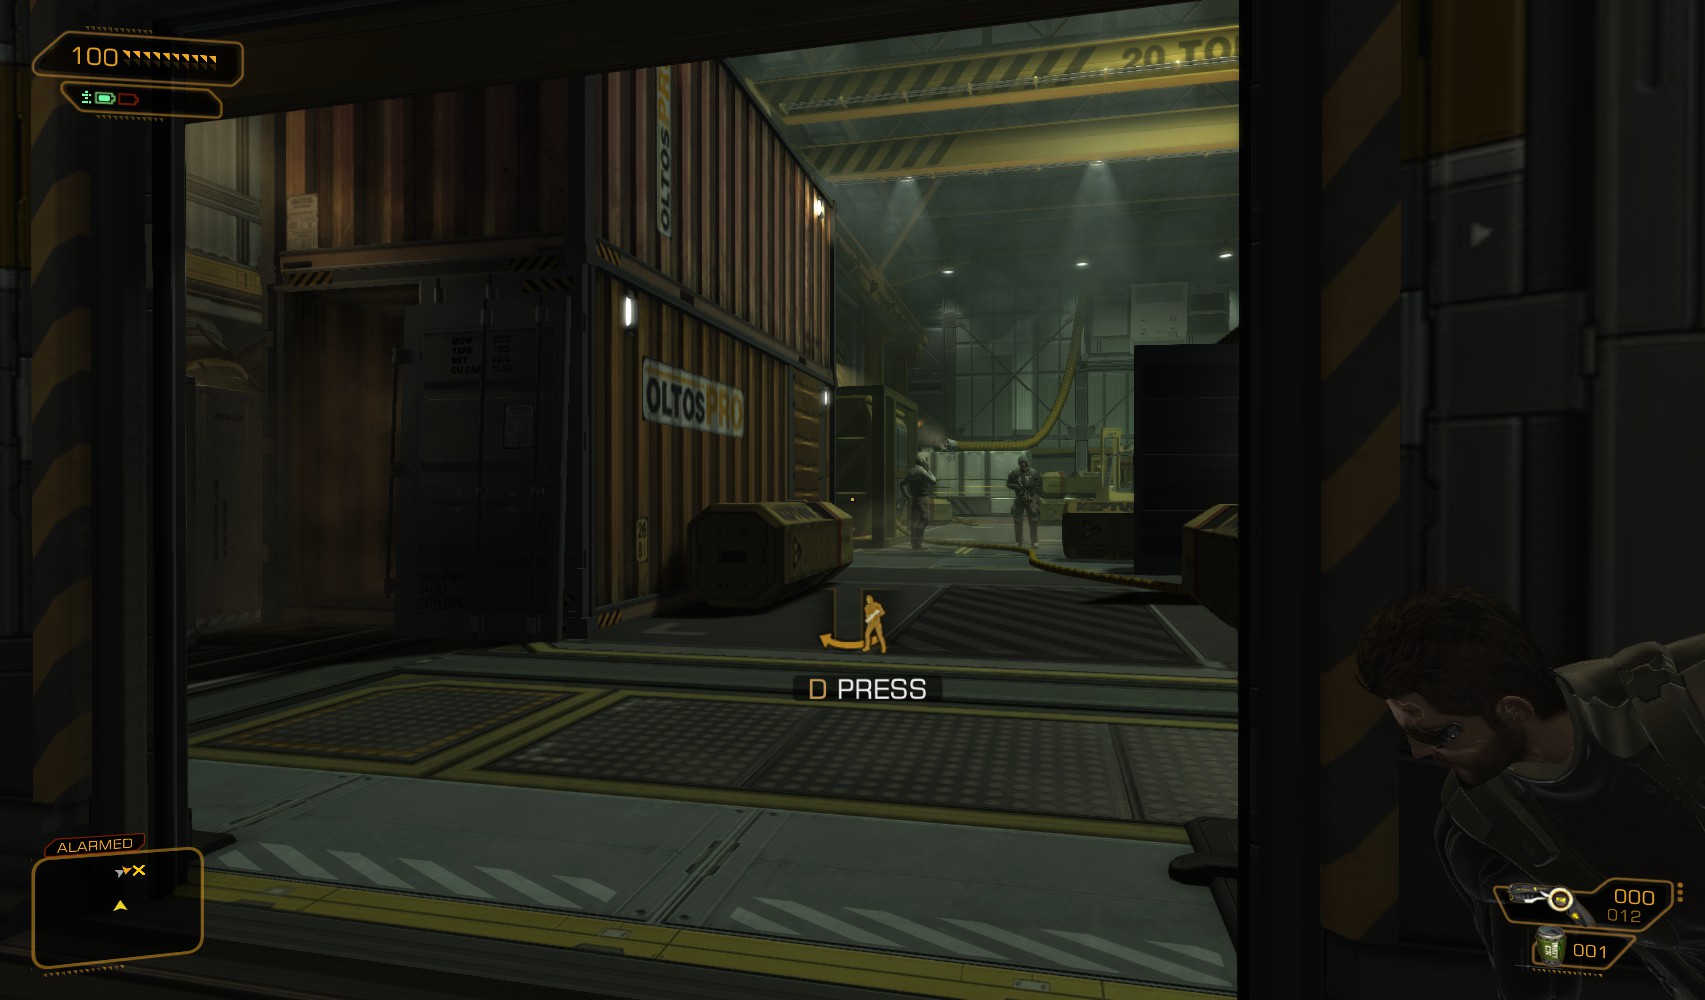
57. Through the door at the end is the aft cargo hold. A guard patrols beyond the door on the right - go and take him out.


59. Back in the control room, take note of the guy just visible working in one of the containers. The unlocked PC just has background emails. Hack the level 2 security hub for 200c and disable 3 cameras. Hunt around for hacking tools and painkillers before going through the door shown left of the security hub.

60. Round the corner, this guy is an easy takedown. Hack the level 3 laser control panel for a nuke (or wait for the code) but don’t go down just yet.

61. Go through the door at the end, and take out this guard for a pocket secretary with the code 9173 for that laser grid. Then double-back to this door on the left. Hack the level 2 alarm panel for 100c, then go through the door and up a ladder.

62. At the top, turn this valve, which clears a gas hazard elsewhere.

63. Move some crates in the entrance near it, and go in for a 200XP explorer bonus, some hacking tools and credits.

64. Return to the ladder by the disabled laser grid and go down. Turn left at the bottom to find an elevator. Leave it be, hack the level 2 alarm panel (no downloads) and carefully go through the door.

65. This area is now clear of gas. The pocket secretary explains why there was gas. Beyond the crates is a body, approach it for a 200XP explorer bonus. Carefully go to the end of the corridor where two guards start up a conversation as you approach.

66. Duck left and take cover near the top of a ladder. One of the guards patrols into this room, and if you’re lucky you can take him down without being noticed by the other guard. Go to the end of this corridor and up a ladder to Deck 02.

67. Move some crates to find an unlocked door, behind which is this stair well that has no stairs. Drop down it (this requires the Icarus lander) for a 200XP explorer bonus.

68. At the bottom, a crawlspace leads to a vent, and this guard. Take him down, then head right.

69. This guard is next.

70. In the other part of the hold, these 2 guards are having a conversation, after which one starts to patrol, the other to inspect the pods.

71. I save my Praxis kits and take them one at a time, the patrolling guy first, in the central corridor area, the inspector when he’s done.

72. This pocket secretary near where they were chatting has the code 6834.

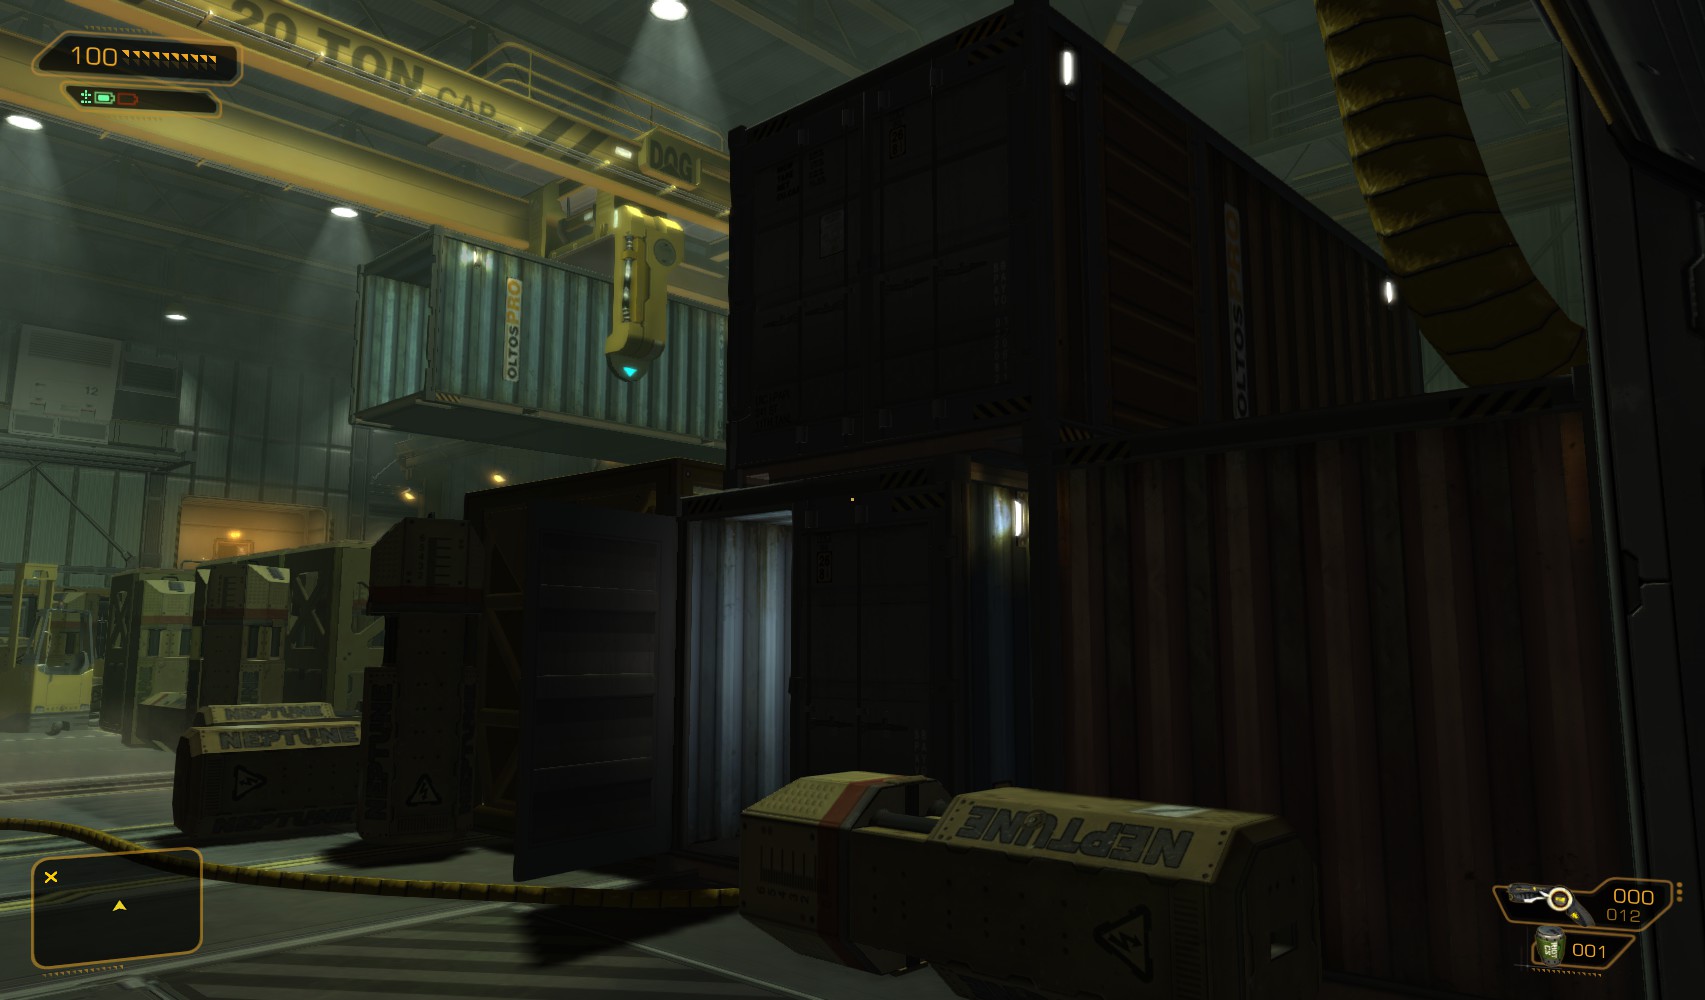
73. Before heading through the laser-guarded doors for the objective, head into the storage bays. Go to the back and up a ladder.

74. These open containers on the right could be seen from the control room earlier. The nearly-closed one contains a guard. You can jump over the gap to the one on the left to get a 300XP pathfinder bonus and a Praxis kit in a case.

75. It can be reached by breaking a wall through from the container next to it, which kills the guard. Alternately, you can find some crates and stack them like this. It was fun for a while, but the novelty wore off - he carries a pocket secretary with the code 8193 to the storage room where you find the crates, and there are some grenades. It’s probably not worth the hassle.

76. Back in the pod cargo bay, read more sad stories on the people being carried, and hack a level 2 alarm panel (no downloads again) before hacking the level 3 keypad for the lasers for 200XP and a stop worm (or use the code 6834).

77. Beyond the door, a level 3 door on the left is a tough hack that gets you a nuke and a stop worm. this guy has the code, but the boxes you could use for climbing up to him are beyond this door, along with heavy rifles.
|
|
|
The open door on the right leads to the Sally port, but first you must pass the bio scanner. You learn a little more about your mystery correspondent before being allowed in. |
||


78. Use the switch on the right to lower the bridge, and then take cover in the open container on the right to find a machine pistol and ammo.

79. This camera is easily slipped past, but instead of going in that way, go left at this point, round the back of the container…

80. ...to here. One crate should be enough to reach that ladder, and a 300XP pathfinder bonus. Find an ammo capacity upgrade and a vent to go through at the top.

81. Three guards patrol here - 2 on the ground, and one in the office, who will eventually patrol that gantry. If you raised any alarms getting here there would be more guards, and an active box-guard here. In the open container below is a sniper rifle. Drop down while the guards are pre-occupied with their inspection.

82. To the left on the ground level is this open container with a stun gun and ammo. Then go back to the main entrance.

83. On the far side of the bay is this open container on the right containing ammo.

84. Beyond that, find this ladder. Sneak up and take the patrolling guard out, then go into the security office.

85. Hack the level 3 security console for 100XP and a nuke, and disable 2 cameras. The cabinets contain a mine template - don’t miss the hypostim on the top. Read the emails on a nearby unlocked PC and swipe credits next to it before sneaking out the far door.

86. Watch for the patrolling guard before slipping down the ladder and taking him out. Find a level 3 security console almost directly beneath the security office. Hack it for 50c. Time to find that 3rd guard.

87. Here he is in the North-eastern corner, slacking off. Attract his attention and take him out too.

88. Nearby is another open container. Climb up for a 300XP pathfinder bonus, a reload speed upgrade, some credits, and a mysterious launcher barrel. Grab that, then return to the laser-protected door.

89. Hack the level 1 laser keypad for 50XP. Go in and enter a vent on the left for a 100XP traveller bonus before going all the way to the other end of the corridor.
90. At the other door, attract the attention of the patrolling guard (on the right) to get him to move away from his mate, then take him out. Slip inside the open container on the left for some tranquilizer darts and an energy pack.

91. Climb over some heavy crates near that container to come out behind the stationary guard. Another guard patrols in the distance - attract his attention and take him out from here, leaving the stationary guard to take down without being seen.

92. Hack a nearby level 3 alarm panel for 50c, then go through the open container to the right of the main entrance door for another 100XP traveller bonus.

93. Inside, another mysterious object. Pick it up, and other the other end of the container.

94. Jump up onto the container, and climb the ladder over the security office.

95. 2 guards remain outside, and 2 are inside the office. The guard on the upper level patrolling the gantry is 1st (a turret protects the other guard on the ground level). He carries a pocket secretary with the code 7736. Hack a level 3 alarm panel for 100c.

96. Next, inside the security office, these 2 are ripe for a double take-down, but I decide it’s not worth spending the Praxis points yet, so I attract the attention of one by making some noise outside, and take them individually. I do need to upgrade my hacking skills to disable that turret, which is achieved by hacking the level 3 security hub for a stop worm. The unlocked PC has some background, search for credits on the side, shotguns and grenades in a weapons cabinet, and hack the level 3 alarm panel for 50c.

97. The last remaining guard is downstairs near the now-safe turret. Take him out. With the area clear, it’s time to have a look around.

98. Hack the nearby level 3 alarm panel for another 50c, then go into the vent for a 100XP traveller bonus and some credits.
99. Jump up to the suspended open container on the left for a 300XP pathfinder bonus and a laser targeting system. On the right, the upper container has a weak wall. I save my Praxis points for now and use a frag grenade combined with a mine template to blow it open.
100. Go in for another 300XP pathfinder bonus, a level 2 security hub (100c) with which you can muck about with the turret next to it. There is also some Typhoon ammo and an XP eBook. "Blurring The Boundaries between Man and Machine [Volume 1]".
101. Next, climb up to the crane suspending the container (on the left) by climbing on top of the security office, and onto the gantry.

102. Up here is a Praxis kit and ammo case.

103. In the South-west corner, just visible, is a vent. Go in for another 300XP pathfinder bonus. It leads back to the upper gantry in the previous area.
104. Time to get to work. The objective is in the maintenance tunnel signed by the yellow warning panel in the North-eastern corner of the area. Now is a good time to invest in the Social enhancer.

105. Open the grate at the end of the tunnel for a cutscene with none other than Netanya Keitner! She wants you to dig deeper about why Belltower are kidnapping scientists and prisoners. Question her further to learn of the existence of a wing of the camp that’s restricted even to Keitner. She’s susceptible to appeasement, if you have the social enhancer, and will reveal both the code to Burke’s office door (6325), and his login (pburke/theogony313).

106. You now have 2 objectives - upload your new biometrics to the central computer, and meet with Quinn, a base engineer, who might provide you with equipment. The unlocked security hub shows that Keitner could have disabled that turret for you! Time to get to work.