
1. As you arrive at Hengsha, an ambush forces the transport down.

2. Now is a good time to create a savegame, because it might take a few goes to get this right. The VTOL is under attack and if you’re not quick enough, Malik will die. This is arguably one of the hardest parts of the whole game. Equip a stun gun and EMP grenade, load up your energy batteries and run full speed to the rear of the area.

3. The stun gun is the weapon of choice here, since takedowns are likely to draw fire from other soldiers who see you. Here there are 2 heavy-rifle wielding soldiers on the left who are doing the most damage. Take them out first. The guy on the right is next. If you’ve been really quick, another combat rifle soldier will be behind the wall to the right of the lift. Stun him if he’s there, then head to the left of the lift behind the scaffolding.

4. Around this time an armoured bot is dropped. Stun the combat rifle guy crouching on the right then chuck an EMP grenade at the bot. Watch your energy and stay cloaked.

5. After the bot is disabled it self destructs so stay away from the blast. Back on the left of this shot near where the heavy rifle dudes were is a set of stairs. Go up.

6. At the top here 2 (or 3 if you missed the earlier opportunity) combat rifle dudes to stun. Again, restock energy, and still cloaked drop down to the right.

7. Still cloaked, take out the combat rifle guy, then head back up the stairs you just used.

8. Head up this ladder.

9. At the top take out this sniper. One more sniper is on the gantries opposite. Drop down and up the stairs at the back (on the right of this shot).

10. He’s the last one. With him out, if you’ve been quick enough, Malik radios in, and takes off. Drop down to the right.

11. Go through the pipe by the electrical hazard for a 300XP pathfinder bonus and some grenades. Search the bodies of the fallen for credits, ammo, weapons and an energy pack.

12. When you’re done, ride the elevator up to Hengsha. Pritchard calls for a chat on the way to say you’re not on Belltower’s Christmas Card List.

13. At the top, exit to Hengsha.

14. When you arrive, your augments glitch horribly, along with everyone else’s! Pritchard contacts you to say that you can collect a replacement biochip at the L.I.M.B. clinic, although he’s going to wait. Interesting. Might as well go to the clinic anyway, straight up the street.

15. A queue has formed outside but you can jump it and go straight in. Look out for prowling Belltower guards - they will attack you now if they see you.

16. As you approach the desk, this guy on the left attracts your attention. Speak to him to get a side-mission - track down Michael Zelazny. When you’re done, talk to the receptionist. I decide to NOT get the biochip replacement, partly due to Pritchard’s reticence, and partly because of evidence from earlier.

17. There are 2 Praxis kits for sale however.
|
|
If you take the replacement chip, you get surgery and emerge a fixed man |
|


18. Outside, take the subway on the left - avoiding the patrolling Belltower guard.

19. As you emerge from the subway station in Youzhao District, Hugh Darrow contacts you and asks you to meet his contact nearby.

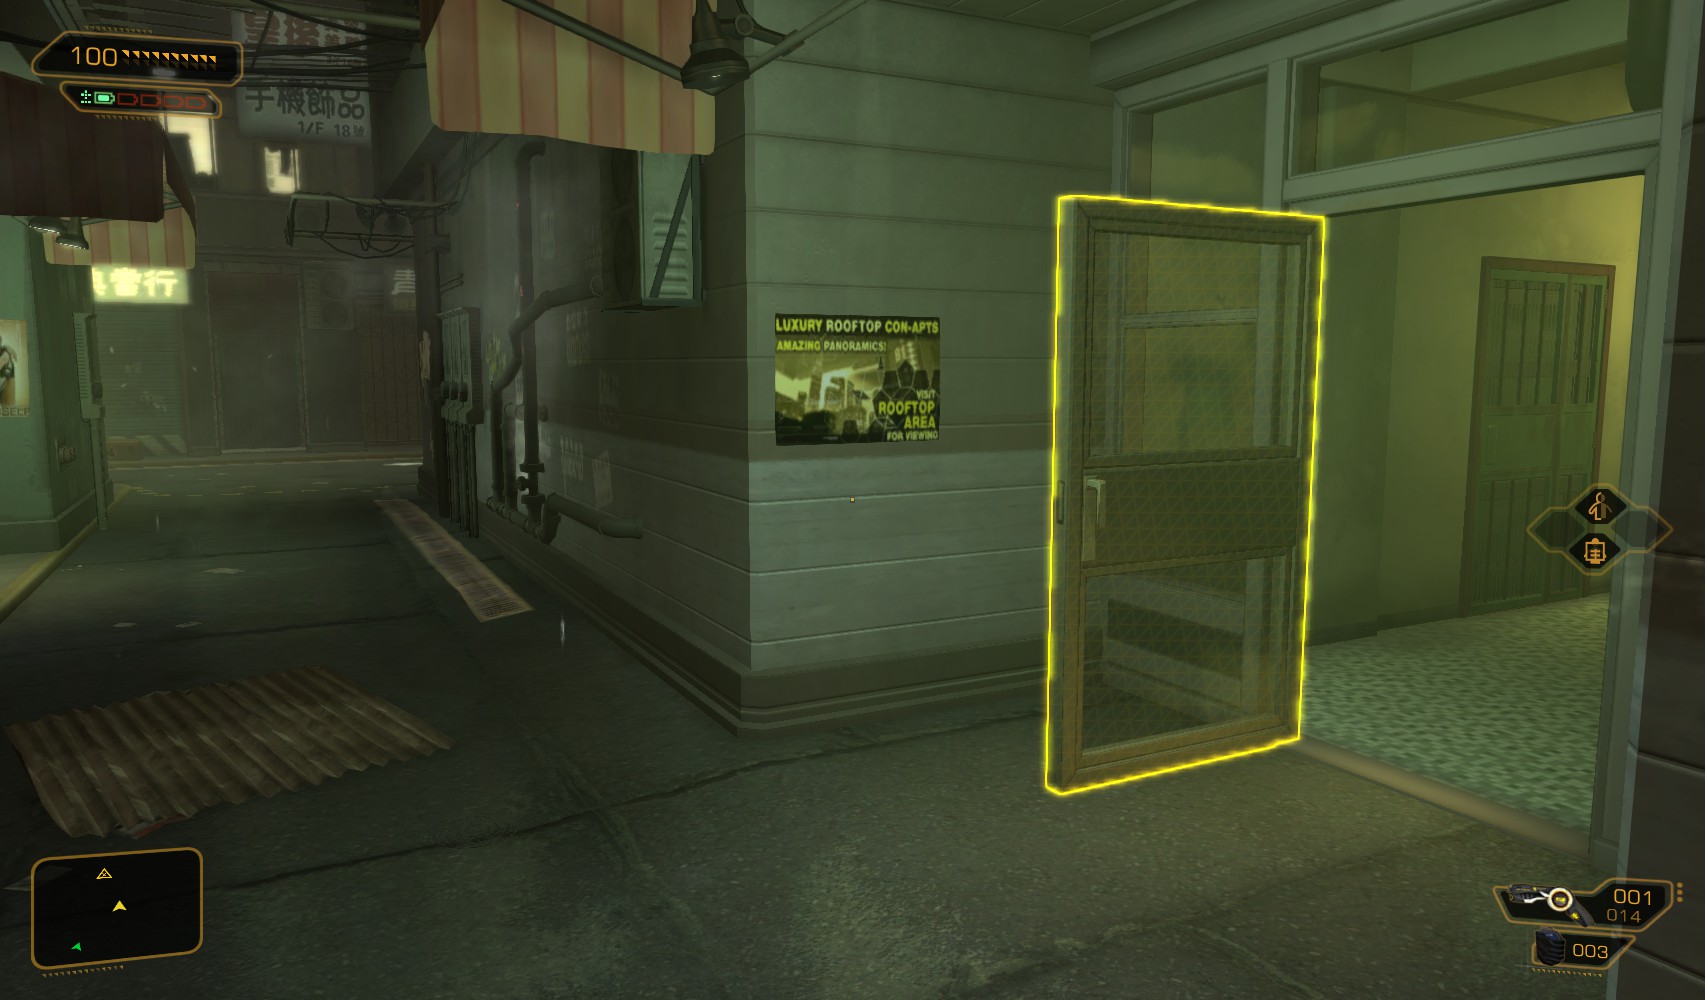
20. Go to the end of the street and follow it to here. Time to meet Darrow’s contact later - first, let’s look into Zelazny. Go through the door on the right and up the stairs.

21. At the top go into the Butcher's shop, and down the stairs at the rear for a 100XP traveller bonus.

22. Search the body for a pocket secretary indicating Zelazny is now hiding out in the sewers. Hack the level safe for a nuke, and find credits inside. Head back out of the shop and climb the ladder nearby.

23. At the top, break through the left-hand weakened wall for some stun gun darts and a 100XP traveller bonus.

24. On the other side you can break through the wall causing severe distress to civilians on the other side…or you can stack some nearby crates and jump over.

25. Mengyao, Darrow’s contact, is here on the right. Speak with her for a new side mission - recover a data chip from some guys.

26. Time to catch up with work. Both Zelazny and the chip for Darrow are in the Daigong district. For an easy route there bypassing Belltower almost entirely, head up the nearby steps (near Lee's apartment) and follow the signs to Kuaigan District.
|
|
At the other end, follow the alley to the stairs near the rear of the Hung Hua Hotel. Follow the stairs to the roof of the hotel and back down the other side. |
|


27. You come out near where you rescued Ning earlier. Make your way around to the alley opposite, where Ning was being held in a storage unit. Beware nearby Belltower patrols.

28. Carefully make your way down to the lower level. One of the terrorists patrols here. You need to take out all 4 men non-fatally to succeed the mission parameters.
|
|
|
|
Take each down out of sight of the others. The two in the corner near the fire don’t turn round and are ripe for a double. Search the bodies of those 2 for the biochip. |
|||


29. When you’re done, go along the alley a little way to find this sewer cover. Head on in.

30. Follow the sewer round to the left to find Zelazny and his men. You have options here, including knocking them all out with a gas grenade, but sometimes talk is better.

31. Approach Zelazny himself to enter a conversation. He seems to know who you are. You learn he’s on a mission to wipe out corruption. I enquire about his motivations, and end up approving of his actions. I guess I’ll have some explaining to do with Dr Wing.

32. Leave the sewer the way you came, and carry on up the alley, heading for the L.I.M.B. clinic. As you go, Zelazny contacts you to say he’s called in some favours to re-assign Belltower patrols, making moving around a little easier. At the L.I.M.B. clinic, speak with Dr Wing. You can lie, but I decide to tell him the truth, then convince him that it was the right thing to do. In return, I receive a Praxis Kit.

33. Outside, I once more take the subway to Youzhao District, and find Mengyao in the same spot on the rooftops.

34. If I inquire about the chip contents, I’m given the opportunity to persuade her into giving me more information. Once again, my charm works and I learn about the Hyron Project.

35. Only the main mission left to do, I notice it’s right nearby. The GPL tracker for the scientists leads me to the Harvester’s hideout. Going to the main entrance at street level only gets me a warning-off, so an alternate method of entry is needed. Head behind the sign on the right near where you met Mengyao.

36. There seems to be a handy vent near the rooftops! How useful. Head in.

37. You emerge in an empty lift-shaft. Drop down on the left. Not quite at the bottom is a door - go on through.

38. It opens onto an abandoned car park.

39. Carefully sneak to the left. Beware patrolling armed men! Keep left, on the nearside of the boxes to a ramp going down.

40. Carefully slip down the ramp to here. The guy seated on the right is asleep and pays you no attention if you’re quiet. Go left behind some barriers.

41. Keep down here. 2 seated guys are awake, and a heavy-rifle armed guy is patrolling. Sneak round to the right, heading to the opposite side of the room behind the sofas.

42. This pocket secretary has the login ttong/mirrshds. Keep going behind the ruined cars, ignoring a weakened wall, to find some cardboard boxes covering a gap in a wall.

43. Move the boxes and go through the gap to here. To the right of the generator is a door - your destination, according to the GPL tracker.

44. Inside you find Tong Si Hung, wearing Sevchanko’s tracked augmentation. He agrees to help you out in return for getting his son out from under Belltower’s nose.

45. When you’ve finished chatting, he pays no attention if you steal the stuff on his desk. Outside, the Harvesters are now friendly and pay you no attention. Outside his office, on the right are some cabinets containing ammo and an energy bar. Tong’s level 3 PC (password mirrshds) can be hacked for 100c and a stop worm. Read about a "Cloaking Device". Next to it is a level 5 safe that has no downloads, but contains credits, an ammo capacity upgrade and Typhoon Ammo.

46. Hunt around for more ammo, then into the other room with the sofas. At the rear are 4 cages. 3 are empty and unlocked, but the second from the right has a level 4 lock for a nuke. Inside is a damage upgrade and a weak wall. Break through for a 200XP explorer bonus. Inside turn left to find another weak wall.

47. Break through it to this room. In here are painkillers, Typhoon Ammo, remote explosives and an XP eBook. "Understanding Vision (part 2) [Volume 3]". Exit via the door.

48. Head back out basically where you came in to the guy sleeping on a sofa. There’s time later to explore more of the Harvesters' hideout. Go through the door on the left behind the sofa, then through another door to emerge in the sewers.
49. Keep following the signs to Youzhao District and emerge in an alleyway near Hengsha Court Garden. Your destination is the sewers where you met Zelazny so follow signs for the Alice Garden Pods. The best way to avoid Belltower from here is to climb some nearby ladders to the roof and head back past Lee's apartment again.

50. Head back over the roof near Hung Hua Hotel and down the other side and into the sewers. On the left here is where Zelazny and his men were earlier. Go up the ladder to the right, then through a door to the Old Noodle Factory.

51. You meet Tong’s contact who gives you an un-identified handheld device. I suspect it’s a Cloaking Device for the lad. Nab some automatic unlock devices and head down the nearby ladder.

52. There are a number of ways in, including a shortcut round to the left. My favourite way is break through the weakened wall here for Typhoon ammo, then move the large crates on the right to (pointlessly) disable the gas with a valve, then go straight ahead down here an hack a level 2 door for 300c and 250XP.

53. Inside, ignore the guard and jump up and through the vent on top of the cabinets.

54. At the other end is this guy sat in front of an unlocked PC with emails about Tong and his son. Careful of the patrols outside. A credit chip is on the side with another unlock device. The level 1 alarm can be hacked for 100XP and a stop worm. The guard is just carrying ammo. I want to leave him be, so head back through the vent.

55. Still ignoring the lone guard from before, I sneak to the door past him on the right, being careful to close it behind me. He’s too absorbed to pay me any attention.

56. In the rest area I find energy bars on the tables, and hack the level 1 alarm panel for another 100XP and stop worm. The keypad by the door is unlocked, and just disables the lasers past the unlocked door. I leave it alone. The other door has a vent that leads back out to the sewer (one of the other ways of entry.

57. A weapons cabinet contains a machine pistol, and other ammo is lying around. Finally I head round to find another door out onto the main factory floor, and head carefully outside.

58. 3 guards patrol below, and another on this level. On the lower level to the right is the room we visited just now.

59. I sneak to the end of the gantry. On the right, you can climb up to find rockets and a ceiling vent into the office below. Instead I cloak and head left past the guard. Behind the crates to the far left is a vent. Head in.

60. Head straight on (ignoring the turning left for now) to find an observation vent overlooking Tong Jnr. Notice there is a camera watching him. Return back along the vent to the junction, and follow that past observation vents to the factory floor - bearing in mind you can be spotted here! At the end is another wall vent.

61. Drop down carefully. There’s nothing for it - this guy has to be taken out. Hack the level 1 security console for a nuke, disable 3 cameras and open a door. Then head through the door on the right. The weakened wall is the shortcut reached from outside.

62. Tong Jr is in the second cell. Swipe the hacking tools from under the bed before speaking to him.

63. Question him about the kidnapping and the device before leaving, and learn that it was, indeed, a Cloaking Device. You’re left to make your own way back out. In the interests of doing things quietly, I leave the way I came.

64. Return to Youzhao District, it’s time to re-visit Tong. At the Harvesters' HQ, use the front door this time.

65. Inside, the level 4 door gets you a nuke, and leads to a level 3 door that gets you a stop worm. It comes out next to the lift shaft you used to enter earlier. Go left and up the ramp past a camera and a turret - both now friendly. (Alternately, return to here and through the open door and down the ramp).

66. In the room on the right is a level 3 security console (10c) where you can disable the camera and turret. A breaker switch in there disables the electrical hazard in the room on the right. There’s also a laser battery and remote explosive device.

67. Breaking the weakened wall to gain entry to the electrified room alarms no-one whatsoever. Head through the vent beyond for a 300XP pathfinder bonus.

68. You drop down in here (to the right of the elevator doors). The level 1 PC gets you 50XP and some story emails. Another unlocked PC nearby has more emails. The level 5 safe in the storage unit on the right is a fearsome hack for 200XP, but gets you a cooling system and another battery for a laser rifle.

69. Near the exit, break through another weak wall for a 200XP traveller bonus. Inside, go down a ladder to another weak wall that comes out near Tong’s office. Time to go an see him.

70. Talk to Tong for your reward - a grenade launcher - and information for your next mission. Infiltrate the Belltower port and stow away on a ship. He tells you to find a package hidden in the port’s offices. You can nab his laser rifle when you’re done - it can be a useful weapon, but it’s big and I prefer my upgraded combat rifle.

71. As you leave, unless you had your biochip replaced, your augs glitch, along with everyone nearby (except Tong himself, funnily enough). Head out through an open door straight ahead out of Tong’s office.

72. Lu Pin Rong is a merchant who’ll buy your unwanted stuff. Head through the nearby crawlspace.

73. Up a ladder, and you emerge in a parking lot. Mindful of the guards beyond the gate to the compound, head to the far end and this hut on the right.

74. Inside are a level 2 PC (100XP) and a level 1 security hub (100c and a nuke). Disable the robots and a camera, but leave the door closed. A nearby breaker switch controls an electrical hazard. Grab some goodies and leave.

75. To the right of the main gate, a hole in the fence is blocked by a heavy crate. Move it aside, and enter the main compound.

76. Inside, keeping an eye out for the guard patrolling outside the nearby hut, move the large garbage dumpster so you can climb on it and through the window into the office.

77. Knock out the guy working at the security console and search him for a pocket secretary with the code 5895. Use the unlocked console to disable turrets and cameras, and hack the level 2 PC (or wait for the password) for 200c, 100XP, a nuke and a stop worm. Read emails to learn that security has been tightened due to the rescue of Tong Jr. A double-barreled shotgun is on a high shelf if that’s your thing. Slip out the way you came in.

78. With the camera and bots out of commission, you can take this guard out, although beware of another patrolling guard further into the compound. Hide the body behind the office just in case, and search him for another pocket secretary with the login prmtr01/collusus. Then sneak to the left.

79. When you reach this point, climb up to the open crate to find a leading system upgrade.

80. By the door is a pretty good vantage point. In this shot are 3 guards. One below (another out of shot guard patrols to the left), one on a nearby roof, and just visible, another on a roof near the large number 22. He’s first - take him out with the tranquiliser rifle (just reachable from here - the target leading system makes it easier) so he doesn’t spot you taking down the rest. When he’s out cold, drop down and continue carefully heading West behind the containers.

81. Behind the containers is this guard patrolling near an open container with a silenced sniper rifle inside. Take him out when he’s near that container and hide his body inside it.

82. Now head North to find the other guy (from the nearer roof) at the top of this ladder. Climb up and take him out. He carries a pocket secretary with the code 6555.

83. Heading back towards the main gate, go down some steps in the South-western corner to find a heavily armed guard.

84. Take him out then head into this vent beneath the stairs for a 200XP explorer bonus.

85. At the other end, the breaker switch turns on fans to dispel the gas.

86. If you have an EMP mine, go through the door and disable this bot, but it’s not really vital - it’s easily avoided, but there’s more exploring to do first. Return through the vent.

87. There are 3 storage units along the passage. The nearest is a level 3 (nuke) and has a rate-of-fire upgrade and some ammo. The next is level 2 (100c and 200XP, or use the code 5895) and contains a damage upgrade and a P.E.P.S. gun. The third is a level 4 door (100c and 200XP) and has a rocket launcher with ammo.

88. Further along beneath the turret you disabled earlier is a level 2 door. Hack it for 150XP and go in and through another open door.

89. Turn left, and then keep right at a junction to find this ladder. Head on up.

90. Open the cabinet and retrieve the package to get an update (and a compliment) from Tong that it’s a bomb he wants you to plant. You can use the explosion as a distraction to achieve your objective of getting on a boat.

91. Open the door carefully. This sleeping guard is easily taken out, although he carries little of interest. Raid the cabinets on the right for ammo, and hack the level 2 alarm panel for 50c. Swipe an energy bar from the table before heading out the window behind the guard.

92. To the left behind the storage crates is a lone guard. Take him out out-of-sight of the camera in the distance here. He carries a pocket secretary with the code 4589.

93. Back out in the main area, this patrolling guard is overlooked by a camera. Time to sneak over and get into the hut that the camera is installed on. Sneak to the open container behind this guard, and wait until he’s not looking before just going in through the door.

94. Inside, hack the level 3 PC for 100XP and a nuke. The code 7785 is on one of the emails. The level 4 security console on the left is much more generous: 300c, 300XP and a nuke. Disable 2 cameras then head back outside.

95. With the camera out of commission, this guard is easy picking. He carries a pocket secretary with the code 3343.

96. 1 guard remains, down the steps on the North-west corner behind the security hut.

97. This open storage unit protected by a camera (that you just disabled) has ammo. Further along is a level 2 door (200XP) that leads back to the underground tunnels.

98. Time to head to the inside area. This level 1 door gets you 100c, or use the code 4589.

99. Inside, raid the drawers for a stun gun and some ammo. Hacking the level 2 PC on the right gets you 150c and 150XP. Hack the level 2 security hub for 200c and 100XP, and disable 2 cameras. A nearby door leads to the warehouse, but a more fun way in exists. Back outside, beneath the now disabled camera, is a ladder to the roof.


101. Inside on the upper level, this guard patrols the stairs. Take him out. Further along the balcony, an open door leads to a kitchen area. Search around for ammo, an energy jar, a hypostim behind a refrigerator, and a reload speed upgrade, then head back outside to the vent. Go in for a 200XP explorer bonus.

102. You emerge under the stairs. There are 3 patrols in the main warehouse area, 2 guys looking over the far balcony, and 2 more in an office on the far left hand side on the ground floor. Take out the 3 patrols on the main floor out of sight of each other - you may have to move bodies to avoid the remaining patrols.

103. With those 3 out of the way, approach the window of the shipping office. Beware the camera on the upper level.

104. When you near the window, the 2 guards inside start a conversation. The guard standing by the window will head for the door when it’s finished. Slip inside and take him out as he goes through it, then knock out the seated guard. Hack the level 1 security console for 75c and 125XP and disable a turret and a camera. Then head back out and up the stairs.

105. At the top, with turret and camera disabled, these 2 are ripe for a double-takedown. One of them carries a pocket secretary with the code 3295 for a nearby level 1 door (150c) and the login jwang/mainman. All resistance crushed, you’re now free to move around at will.


107. A cutscene ensues wherein you learn of Tong’s treachery, and that someone else was using the distraction.

108. The name Tracer Tong might mean something to you if you’ve played the original game.

109. You hide away in a storage container, destination: unknown.